Here I begin laying
track on the N-Trak modules that I have been working on. The first thing I had to do was mark the
centerline of the track on all of the modules so that cork roadbed can be laid. This is relatively simple on the straight
module. N-Trak standards call for the 3
community track centerlines to be 17, 18 ½ and 20 inches from the back edge of
the module (2 feet overall depth). You
can sort of see my markings in photo 1.
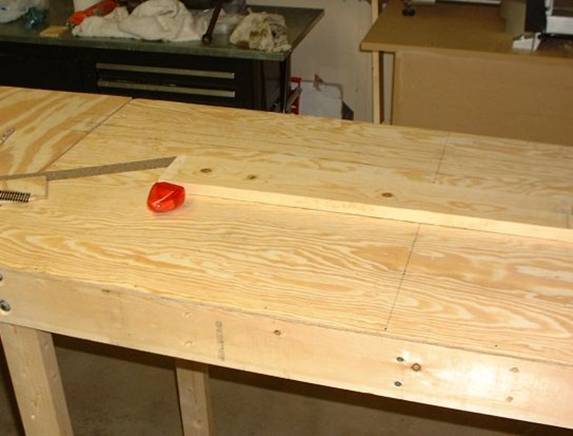
1.
Next up is the 4
foot corners. This gets a bit
trickier. The specifications for 4 foot
corners call for the 3 community tracks to have radii of 29, 30 ½ and 32
inches, the last 4 inches before the edge to be straight and a transition
between the straight section and the curve.
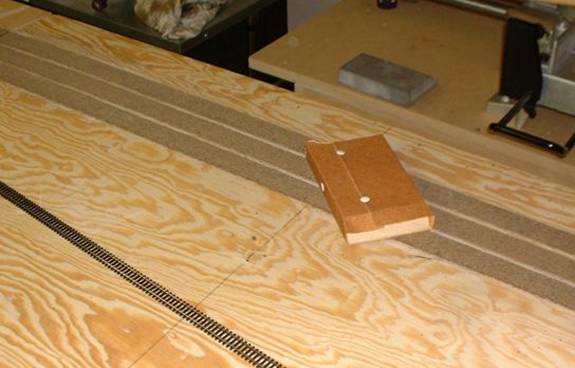
I started by marking the straight sections and drawing the curves with a
piece of scrap wood anchored at the center point of the radius. Holes are drilled in the piece of wood for
each of the radii that are big enough for a pencil point to fit through. It is then a pretty simple matter of scribing
the radius onto the surface. See photo
2.
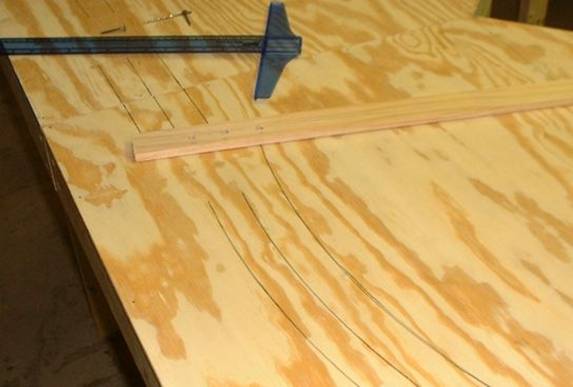
2.
As you can
see, the straight section and the curves
do not join… this is where the transition comes in. Now, there are lots of articles and formulas
that you can use to create transitions, but I found the easiest method was to
anchor a section of flex track at the end of the straight section and at the
point where the curve enters the transition (See the N-Trak manuals for
calculating this point which varies depending on the radius). When the flex track is anchored at these 2
points, it forms a smooth transition.
See photo 3. You can then mark
this by taking a pencil and marking the centerline between the ties for the
length of the transition. This will
result in a dashed line.
3.
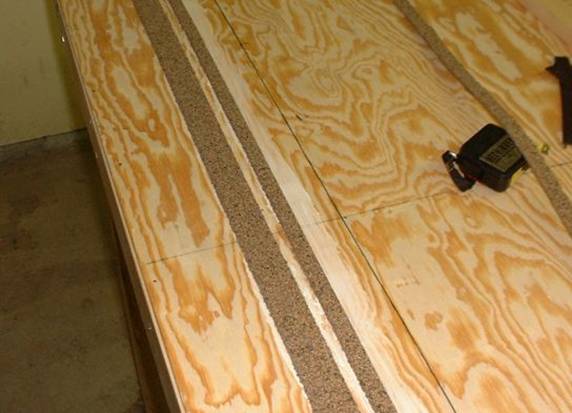
Once all the
centerlines were drawn, I began laying the cork roadbed along the centerline,
as seen in photo 4. I used Liquid Nails
For Projects (foam compatible) adhesive.
This adhesive works well, cleans up with water, and has no obnoxious
fumes. The Liquid Nails is sufficiently
tacky that no thumb tacks are needed to hold down the roadbed except for a few
places in the curves while the adhesive dries.
I let all of this dry over night.
4.
Next, I sanded the
top and shoulders of all the roadbed to smooth out any rough spots. See photo 5.
5.
After sanding, I
gave the roadbed a coating of grey automotive primer spray paint. This is a trick I read about in one of the
magazines or forums someplace. It helps
to hide thin spots in the ballast later on… supposedly. We’ll see on that one, since I will also be
painting the track after it’s laid. See
photo 6.
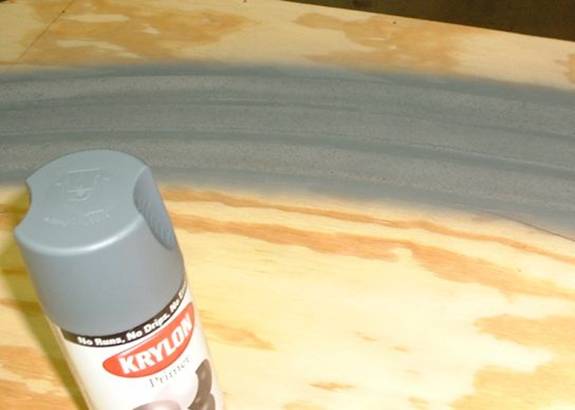
6.
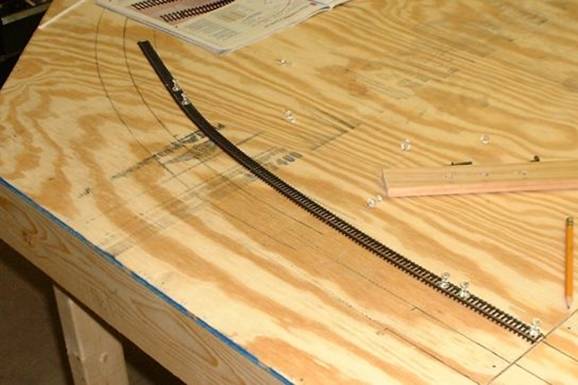
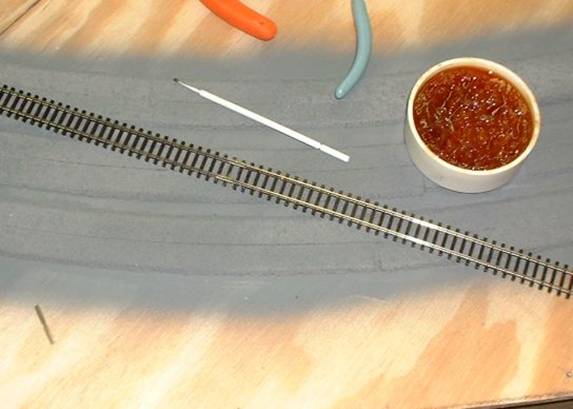
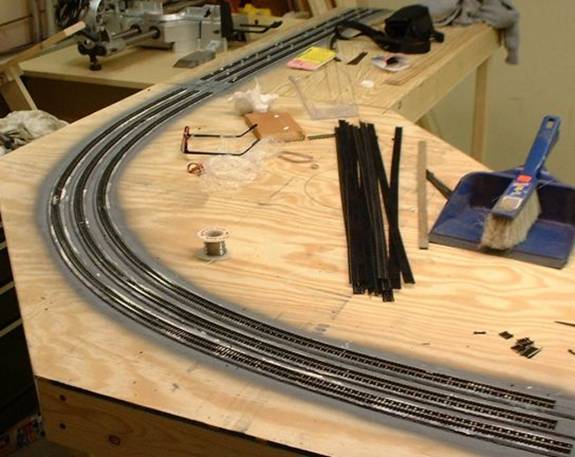
Next, it’s finally
time to lay some track! Again I’m using the
same Liquid Nails for an adhesive. To
hold the track in place while the adhesive dries, I’m using Atlas track nails
in the holes in the ties temporarily (not driving the nails in al the way). See photo 7.

7.
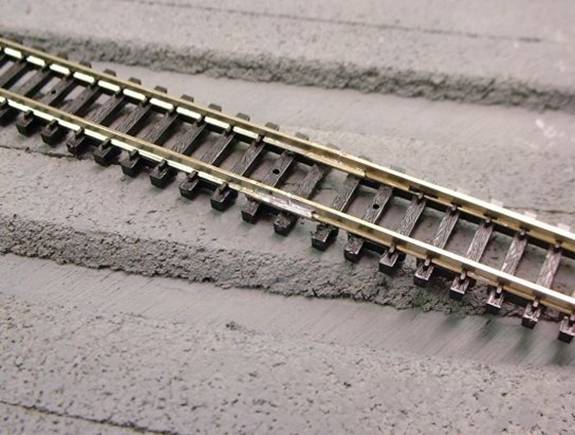
It should be noted
that the N-Trak manual suggests laying the track beyond the 2 ½ inch gap from
the edge of the modules (to accommodate the 5 inch Snap-Track pieces used to
join the modules). The ends will be cut
to the proper offset later.
When laying the
track on a curve, I’ve found the best method to get a smooth curve with no
kinks in the joints is to solder the joints.
(I did not solder the joints on the straight module). When anchoring the track on a curve, leave
the last couple of inches straight and solder on the next piece. Then when you continue, the joint will be
smooth. See photo 8.
8.
The key to
soldering track easily is FLUX. When
soldering track, I use a 15 watt, needle tip, electronics soldering iron
(available at Radio Shack and probably elsewhere). This is a relatively low-wattage iron
compared to most, but plenty for trackwork with little or no melting of
ties. I also use a very thin rosin core
electronics solder, and a water soluble flux.
First dab some flux onto the outside of the joint where the rail joiner
meets the rail. Use a toothpick or a
fine tipped glue applicator. Next,
making sure the soldering iron is fully heated; hold the tip to the joint. When the flux starts to bubble (about 2
seconds), let the iron drawn in about 1/8 to ¼ inch of solder and run in along
the length of the rail joiner with the tip of the soldering iron. The whole process probably takes 5 – 10
seconds. I would suggest practicing this
on some scrap track, but it really is easy, and the results are good. See photo 9.
9.
Finally, photo 10
shows the finished product.
10.
Next,
finishing the track & some wiring...